Table of Contents
ToggleA tight kitchen doesn’t have to feel cramped or inadequate. With smart storage solutions, thoughtful design choices, and strategic layouts, small kitchens can become powerhouses of efficiency and style. Whether you’re dealing with a galley setup, a corner nook, or a studio apartment kitchen, the right small kitchen ideas can make every square inch count. This guide walks you through practical, tested strategies that homeowners and DIYers use to transform limited kitchen spaces into functional, inviting hubs, without very costly or requiring major renovations.
Key Takeaways
- Maximize vertical storage with floor-to-ceiling cabinets, floating shelves, and wall-mounted racks to make small kitchen ideas work without sacrificing functionality.
- Light colors and layered LED lighting create an open, airy atmosphere that makes compact kitchens feel spacious and inviting.
- Multi-functional appliances and versatile furniture, like drawer-style dishwashers and fold-down tables, help small kitchens do more with minimal footprint.
- Optimize your kitchen layout by keeping the work triangle (sink, stove, refrigerator) compact and ensuring at least 15 inches of space between the stove and fridge to improve efficiency.
- Add personality through small-format backsplash tiles with light grout, contemporary hardware, and subtle accent colors on open shelving without overwhelming the tight space.
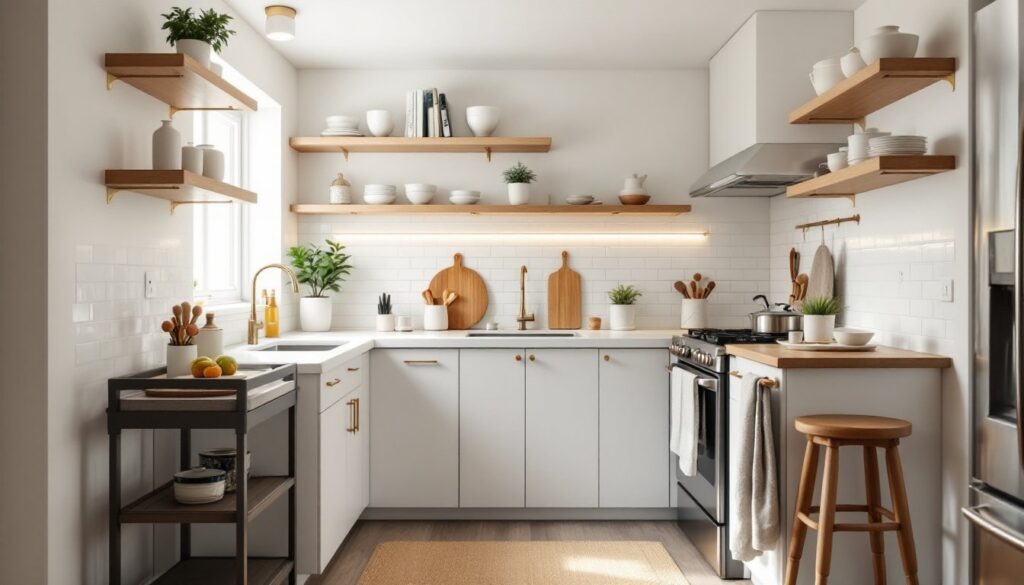
Maximize Vertical Storage for Compact Kitchens
When floor space is limited, walls become your best friend. Most small kitchen owners underuse vertical real estate, leaving potential storage on the table. Floor-to-ceiling cabinetry, wall-mounted shelving, and hooks all pull double duty: they store essentials and visually draw the eye upward, making the space feel taller.
Open Shelving and Wall-Mounted Solutions
Open shelving works beautifully in small kitchens because it doesn’t block sightlines the way solid cabinet doors do. Install floating shelves at standard heights, typically 12 to 18 inches apart, and use stainless steel or wood brackets rated for the load you’ll place on them. A standard shelf holding dishes, glasses, and cookbooks can safely hold 25–50 pounds per foot of length, depending on bracket quality and wall construction.
Before installation, locate studs in your drywall using a stud finder. Anchor mounting hardware directly into studs whenever possible: if studs don’t align with your desired shelf placement, use heavy-duty toggle bolts or expansion anchors rated for the weight. Many DIYers skip this step and wonder why shelves sag after a few months.
Wall-mounted racks for pots, pans, and utensils free up under-sink and cabinet space. A magnetic knife strip mounted at eye level keeps knives accessible and adds visual interest. Pegboard systems offer flexibility, you can rearrange hooks as your storage needs shift. Paint the pegboard to match your kitchen aesthetic, and use wooden or metal pegs depending on style preference.
Mountain your spice rack to the side of a cabinet or inside a cabinet door using adhesive or screw-mounted spice shelves. This keeps spices within arm’s reach during cooking and clears counter space. Consider labeling spices on the spine so you can grab what you need without fumbling.
Choose Light Colors and Smart Lighting to Create Openness
Color and light work hand-in-hand to make small spaces feel larger. Light, neutral tones, soft whites, pale grays, warm creams, and muted earth tones, reflect light and create an airy feel. Paint upper cabinets and walls in these shades, then add personality through textiles, hardware finishes, or a bold backsplash that doesn’t overwhelm.
Dark wood cabinetry has warmth but can visually close in a small kitchen. If you love darker finishes, limit them to lower cabinets or an island (if space allows) and keep upper cabinetry light. This breaks up the visual mass and maintains openness overhead.
Lighting makes or breaks a small kitchen’s functionality and mood. A single overhead fixture isn’t enough. Layer your lighting with task lighting (under-cabinet LEDs for cooking prep), ambient lighting (ceiling fixtures for general visibility), and accent lighting (a small pendant or wall sconce for visual interest). LED strips tucked under shelves or cabinets brighten work surfaces without adding heat or bulk. They’re energy-efficient, cool-running, and inexpensive, a 16-foot strip costs $15–$40 and takes 15 minutes to install with adhesive backing.
Consider a full-spectrum or warm-white color temperature (2700K–3000K) for task and ambient lighting. This mimics natural daylight and makes the space feel inviting at all hours. If your small kitchen has a window, use sheer or light-filtering blinds that let daylight in without creating glare or fading finishes.
Invest in Multi-Functional Appliances and Furniture
Space-saving appliances do more with less footprint. Instead of a separate microwave, toaster, and blender, a combination microwave-convection oven handles roasting, baking, and reheating. A drawer-style dishwasher slides under the counter like a cabinet, and some models hold as many dishes as full-size units. A compact refrigerator with a top freezer takes up minimal width while offering surprising capacity.
Resist the urge to fill every cabinet with duplicate tools. One good chef’s knife, a serrated bread knife, and a small paring knife handle 95% of cutting tasks. A single 8-inch sauté pan and a 2-quart saucepot with lids manage most cooking. Store versatile items that serve multiple purposes: a cutting board that doubles as a serving board, or a mixing bowl that fits inside another to save cabinet space.
A slim cart or wheeled storage unit gives you flexible storage that moves where you need it. Pull it next to the stove during meal prep, tuck it in a corner otherwise. Look for one with at least two shelves and metal or wood construction rated for kitchen use, avoid models with particle-board shelves that warp under heat or humidity.
Consider a space-saving table with drop leaves or fold-down sides if you lack a proper dining area. When extended, it seats four: folded, it’s a narrow desk or prep surface. Install it against a wall to stay out of the traffic flow. Resources like Apartment Therapy regularly feature clever furniture solutions for tight layouts.
Optimize Your Layout With an Efficient Workflow
The work triangle, the distance between your sink, stove, and refrigerator, should be compact but not cramped. Ideally, the sum of the three sides should measure 15–26 feet. In a true small kitchen, aim for the lower end. If your sink and stove sit next to each other with the fridge nearby, you’ve got an efficient setup that minimizes wasted steps.
One critical point: never place the refrigerator directly next to the stove. Heat from the stove makes the fridge work harder, wasting energy and reducing lifespan. Leave at least 15 inches of counter space between them if possible, or use an insulated divider to buffer heat.
Arrange your layout to minimize reaching across cooking surfaces. Prep items (cutting board, mixing bowls) live near the sink. Pots and pans hang above or sit in a drawer next to the stove. Plates and glasses occupy a cabinet near both the dishwasher and dining area. This reduces unnecessary steps and makes cooking faster.
If you’re installing new cabinetry or rearranging, measure twice and account for door swing clearance. A cabinet door that opens into foot traffic becomes a daily frustration and a safety hazard. In a galley kitchen, if both sides have cabinets, consider one side with pull-out drawers instead of swing doors, they require no clearance and access is easier with both hands full.
Add Visual Interest With Backsplashes and Accents
A thoughtfully chosen backsplash anchors a small kitchen’s personality without overwhelming it. Subway tiles, hexagons, or small-format mosaics work better than large, monolithic slabs, which can feel oppressive in tight spaces. Light grout (white, cream, or pale gray) opens the space visually: dark grout creates shadows and heaviness.
If you’re installing a new backsplash, start with a clean, primed surface. Use thinset mortar rated for your tile type (porcelain, ceramic, or glass), applied with a notched trowel, typically 3/16-inch for small tiles. Space tiles with spacers to maintain even grout lines, then grout after 24 hours with epoxy or urethane grout if possible. These are more durable and stain-resistant than traditional cement grout, especially in a kitchen where splashes are frequent. Budget $100–$300 in materials for a typical small kitchen backsplash: labor adds significantly if hiring a contractor.
Hardware, knobs, pulls, and hinges, also contributes visual interest. Matte black, brushed brass, or polished chrome finishes are timeless. Mismatched hardware on purpose (solid handles on lower cabinets, knobs on uppers) adds contemporary flair without clashing. Ensure hardware is rated for cabinet weight and cabinet door thickness.
Small décor items, a framed print, potted herbs on a shelf, or a table runner, humanize the space without cluttering it. The Kitchn regularly publishes kitchen styling ideas that balance function with aesthetics. Paint inside open shelving or the back wall of floating shelves in a soft accent color, sage, soft blue, or warm terracotta, to add depth without taking up physical space.
Conclusion
Small kitchens succeed through intentional choices about storage, color, lighting, and workflow. By maximizing vertical space, choosing light finishes, investing in versatile appliances, streamlining your layout, and adding thoughtful design touches, you can build a kitchen that feels spacious, functions beautifully, and reflects your style. The key is prioritizing what matters most, for you, that might be prep space, appliance capacity, or visual warmth, and letting that guide your decisions. Start with one or two improvements: most small kitchen transformations happen incrementally, not all at once.