Table of Contents
ToggleShower tile edging might seem like a minor detail, but it’s the difference between a polished bathroom and one that looks incomplete. A raw tile edge isn’t just visually unfinished, it’s a safety hazard and a dirt trap. The right edge trim protects the tile substrate, provides a clean transition, and ties your entire shower design together. Whether you’re renovating a dated bathroom or finishing a new shower installation, choosing the right tile edge trim sets the tone for the whole space. From sleek metal finishes to natural stone accents, there are dozens of ways to frame your shower tiles in 2026.
Key Takeaways
- Shower tile edge trim is essential for safety, durability, and aesthetics—protecting tile substrates and creating clean transitions throughout your shower design.
- Metal trim options like stainless steel ($8–$15/linear foot) and brass ($12–$25/linear foot) offer durability and modern aesthetics, while porcelain trim ($5–$15/linear foot) provides versatile, cost-effective compatibility with nearly any tile style.
- Natural stone edging adds luxury but requires professional installation, regular sealing, and careful maintenance—reserve it for decorative accents rather than full edging systems.
- Glass and frosted edge designs deliver contemporary elegance for minimalist bathrooms, though they demand regular polishing to prevent water spots and fingerprint visibility.
- Test trim samples beside your chosen tile, assess your bathroom’s ventilation and moisture levels, and consult a professional if uncertain about installation to ensure a polished, long-lasting result.
Metal Trim Options for a Modern Look
Stainless Steel and Chrome Finishes
Stainless steel and chrome trims are workhorses in modern bathrooms. They’re durable, moisture-resistant, and require minimal maintenance, ideal for a wet environment like a shower. Stainless steel trim resists corrosion better than chrome and won’t show water spots as easily, making it practical for daily use. Chrome has that bright, reflective finish that feels upscale and contemporary, though it does need occasional polishing to prevent fingerprints and mineral deposits from showing.
Both come in standard profiles: bullnose edges (rounded), L-shaped trim (for inside and outside corners), and straight edge trim (for transitions). Installation is straightforward, most trim pieces use a thin-set mortar bedding or adhesive backing. Stainless steel runs about $8–$15 per linear foot: chrome is similar or slightly cheaper but may tarnish over time in humid environments.
When ordering, confirm the tile thickness you’re working with. Standard wall tile is 3/8 inch to 1/2 inch, and trim profiles vary to match. A miter saw or handheld angle grinder works for cutting metal trim, though you’ll want eye protection and gloves, metal edges are sharp.
Brass and Gold Accents
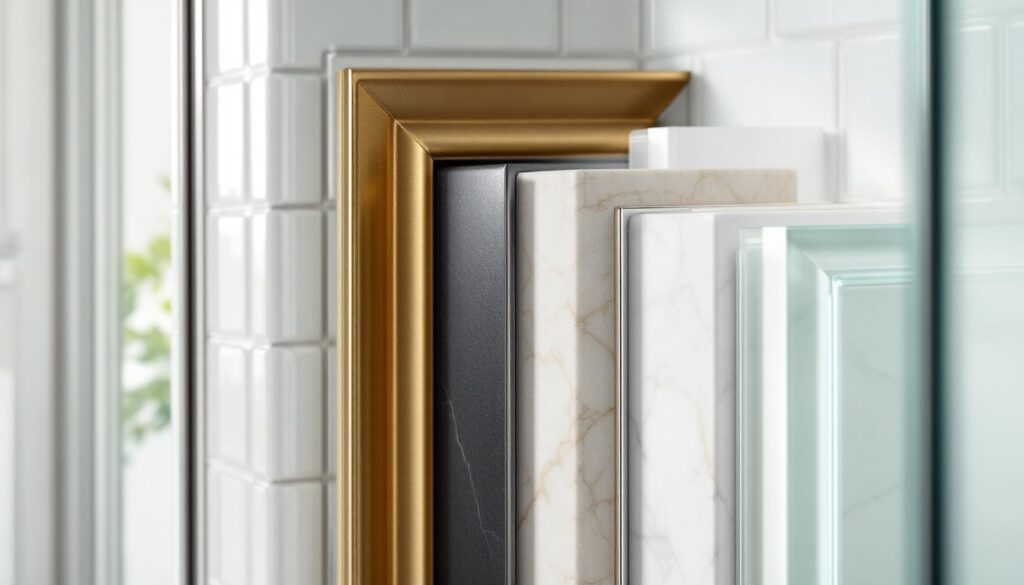
Brass and gold trims have made a strong comeback in design-forward bathrooms. They add warmth and visual interest without feeling dated if executed with restraint. Brushed brass feels more contemporary than shiny brass: it’s also more forgiving with fingerprints. Gold finishes range from warm champagne tones to deep antique gold.
Brass trim costs more than stainless steel, expect $12–$25 per linear foot, but it complements both traditional tile patterns and modern minimalist designs. The catch: brass can oxidize and tarnish in very humid conditions, so ensure proper ventilation in your bathroom. A regular light cleaning with a soft cloth keeps it looking fresh.
Install brass trim the same way as stainless steel: set it in mortar or use adhesive-backed versions for simpler projects. Brass is softer than steel, so use a hacksaw or fine-tooth blade rather than abrasive cutting tools that might damage the finish.
Natural Stone and Marble Edge Treatments
Natural stone edging, marble, granite, slate, or limestone, adds organic beauty and feels luxurious. These materials are porous and softer than ceramic, so they require sealing and careful maintenance. Honed marble (matte finish) hides water spots better than polished marble but still needs annual sealing.
For shower applications, stone trim works best as decorative accents rather than full edging systems. Think a marble threshold at the base or a few accent pieces around the shower opening. Stone edges are typically 3/4 inch to 1 inch thick and require professional-grade adhesive and grout sealing. Installation isn’t DIY-friendly if you’re cutting custom shapes, those lines need precision to avoid shattering the stone.
Stone trim costs $30–$60+ per linear foot depending on the type. Granite is more durable than marble in a shower: limestone and slate are softer and stain easily. If you love the look but want durability, consider pairing real stone accents with engineered quartz or porcelain tile trim for the bulk of the edging. This hybrid approach gives you the aesthetic without the maintenance headache.
Proper ventilation is crucial with natural stone. Trapped moisture behind poorly sealed stone edges can lead to mold and degradation. Consult a tile professional if you’re uncertain about moisture management in your specific bathroom layout.
Ceramic and Porcelain Trim Solutions
Ceramic and porcelain trim pieces are your most versatile option and work with nearly any tile style. Porcelain is denser and more water-resistant than ceramic, making it the better choice for shower environments. Both come in an infinite range of colors, finishes, and profiles to match or contrast your field tiles.
Standard ceramic trim includes bullnose pieces (rounded edges), quarter-round (concave curves), L-shaped corners, and V-cap trim (for caps and transitions). Porcelain trim is slightly pricier but lasts longer, $5–$15 per linear foot is typical for quality pieces. Ceramic trim runs $3–$10 per foot but may chip more easily in high-impact areas.
The real advantage of ceramic and porcelain trim is simplicity. You’re using the same material and installation method as your field tiles, all thin-set mortar and matching grout. Color and texture coordination is easy. If your tile has a matte finish, choose matte trim: if you’re using glossy subway tile, glossy trim looks intentional and cohesive.
Installation is standard tile work: apply mortar with a notched trowel (size depends on tile size), press the trim firmly, use spacers for consistent grout joints, and grout after 24 hours. A wet saw helps you achieve clean miters at corners. Ceramic trim tolerates minor cutting imperfections better than stone or metal, so it’s more forgiving for DIY installers.
For a personalized look, match your tile edge profiles carefully to ensure consistent joint widths and a professional appearance throughout the shower.
Glass and Frosted Edge Designs
Glass edge trim brings an unexpected elegance and transparency that works beautifully with modern and minimalist designs. Clear glass edges feel light and contemporary: frosted or textured glass adds privacy and diffuses light. Some designs incorporate colored glass to tie in accent details from your vanity or fixtures.
Glass trim isn’t as common as ceramic or metal, so you’ll have fewer profile options and longer lead times. Expect to pay $15–$30 per linear foot. Installation requires a specialized adhesive formulated for glass-to-tile bonding, standard thin-set mortar can work, but check manufacturer recommendations. Glass is fragile, so handle carefully and wear gloves and eye protection during installation.
Glass trim shines in shower surrounds with glass walls or glass subway tile. It’s visually subtle, which appeals to minimalists who want finished edges without visual weight. The downside: it shows water spots and fingerprints instantly. Regular buffing with a soft cloth keeps it clear, but if that’s not your style, glass trim might add maintenance instead of reducing it.
For a cohesive bathroom, explore design-focused tile selections that pair glass trim with complementary materials. Mixing glass with metal accents (brushed brass or matte stainless steel) creates a sophisticated, layered look. Glass edges work in corner and edge applications but less often as full perimeter trim, reserve them for focal points.
Conclusion
Your choice of shower tile edge trim affects durability, maintenance, and the overall visual impact of your bathroom. Stainless steel and porcelain offer the best balance of cost, durability, and ease of installation for most DIYers. Brass and stone add personality and warmth but demand more maintenance. Glass is for the design-conscious homeowner willing to keep up with polishing.
Before settling on a trim style, test how it looks beside your chosen field tile and consider your bathroom’s ventilation and moisture levels. A professional tile setter or bathroom designer can guide you through material compatibility and installation if you’re uncertain. The few hours spent selecting the right edge trim now will pay dividends in a finished-looking bathroom that’ll serve you well for years.