Table of Contents
ToggleKitchen ventilation doesn’t have to be an eyesore. Under cabinet range hoods offer a practical, space-saving solution that keeps cooking odors and steam in check while integrating into your existing cabinetry. Whether you’re dealing with a tight galley kitchen or a sprawling open layout, the right under cabinet hood can improve air quality and enhance your kitchen’s aesthetics. This guide walks you through seven proven design solutions, installation considerations, and how to pick the hood that works best for your space and cooking habits.
Key Takeaways
- Under cabinet range hoods combine practical ventilation with aesthetic appeal, offering solutions for everything from compact 24-42 inch stainless steel models to seamlessly integrated cabinet designs.
- The right CFM rating depends on your cooktop size—calculate approximately 100 CFM per linear foot, so a 36-inch range typically needs around 300 CFM for optimal performance.
- Ducted hoods are more efficient at removing moisture and odors outside, while ductless convertible hoods provide flexibility and are ideal for renters or kitchens where external venting isn’t feasible.
- Proper installation requires securing mounting brackets to solid wood studs, maintaining 18-24 inches clearance above the stove, and ensuring smooth metal ductwork slopes slightly upward to prevent grease buildup.
- Cabinet-integrated and slide-out under cabinet hood models offer space-saving solutions for island cooktops and tight kitchens, though they may require professional installation and cabinet modifications.
Stainless Steel Compact Hoods: The Modern Classic
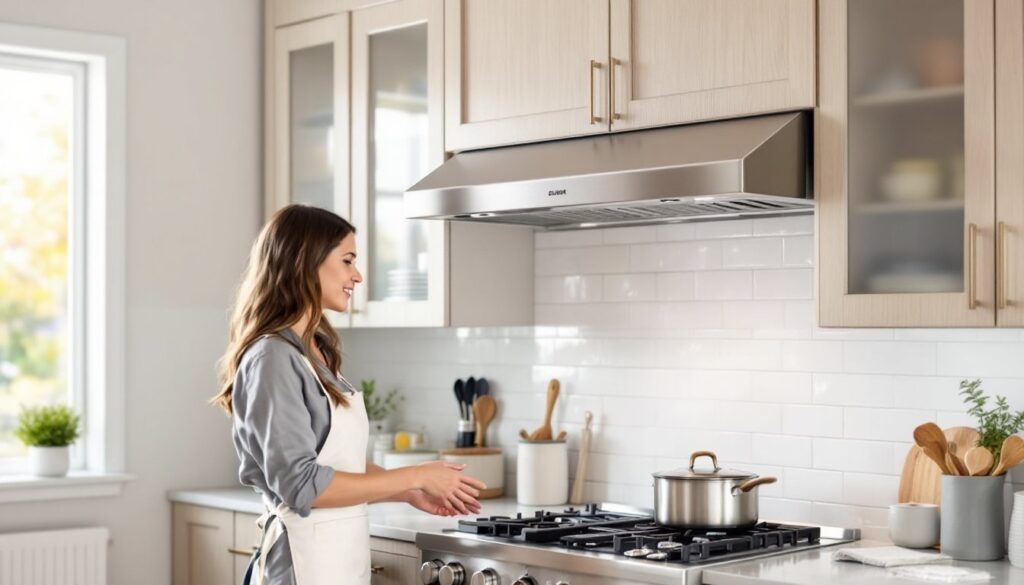
Stainless steel compact hoods are the workhorse of kitchen ventilation. These models measure typically 24 to 42 inches wide and mount directly under standard wall cabinets, delivering 200 to 400 CFM (cubic feet per minute) of ventilation, plenty for most home cooking scenarios. The brushed or polished stainless finish complements contemporary, industrial, and traditional kitchens alike. Installation is straightforward: mount brackets to the cabinet frame, secure the unit, and connect to either ductwork or a recirculating filter system (more on that later). Most models include a slide-out or fixed baffle filter that’s simple to remove and clean. Cost-wise, you’re looking at $300 to $800 depending on build quality, CFM rating, and whether it’s ducted or ductless. The real advantage here is simplicity, no custom cabinetry needed, and many retrofit directly into existing cabinet gaps.
Island and Slide-Out Models: Space-Saving Ventilation
If your cooktop sits on an island, a traditional under-cabinet hood won’t work. That’s where island-mounted and slide-out models shine. Island hoods hang from the ceiling directly above the cooking surface, pulling steam and odors straight up. Some slide-out models are tucked into base cabinets and extend when you cook, then retract when you’re done, brilliant for tight kitchens where you want an uncluttered look the rest of the time. Slide-out hoods typically range from 18 to 30 inches and deliver 300 to 500 CFM. Installation requires ceiling-mounted ductwork or a downdraft system, which can mean running ducts through walls or the attic, definitely a more involved project than wall mounting. Budget $500 to $1,500 for quality island models, plus ductwork costs. If your island isn’t centered or your ceiling has obstacles, consider hiring a HVAC professional to plan ductwork routing before purchasing. Some builders recommend island hoods over recirculating units because they actually move heated or cooled air out of the home rather than pushing it back into the room.
Convertible Hoods: Ductless and Ducted Options
Convertible hoods offer flexibility you don’t get with fixed models. Buy once, install as ductless now, convert to ducted later if you ever renovate. These units ship with both ducting connections and recirculating filter ports. Ductless (or recirculating) operation uses charcoal and mesh filters to trap grease and odors, then pushes clean air back into the kitchen, no external venting required. Ducted mode routes steam and odors outside, which is more efficient for heavy cooking but requires wall or roof penetration. Most homeowners find ductless operation adequate for light to moderate cooking: serious cooks or open-concept kitchens usually prefer ducted. Convertible hoods range from $400 to $1,000 and work well for renters, small kitchen owners, or anyone uncertain about permanent installation. The trade-off is noise: ductless models can sound louder because they’re reheating room air instead of venting it outside. If you go ductless, replace charcoal filters every three to six months depending on cooking frequency.
Cabinet-Integrated Hoods: Seamless Design Integration
Cabinet-integrated (or built-in) hoods blend so seamlessly into your cabinetry that guests might not even notice them. The hood slides or pops out from inside a cabinet, behind a decorative wood or stainless panel that matches your kitchen. This approach works beautifully in transitional or traditional kitchens where you want ventilation without visual weight. Installation is more labor-intensive: you’ll often need to remove existing cabinet doors, modify cabinet openings, and carefully align the hood with your cabinet face frame. Many models require custom cabinet work or semi-custom cabinet ordering to ensure proper fit. Expect to pay $800 to $2,000 for the hood alone, plus cabinet modifications. The payoff is a kitchen that looks intentional and high-end. If you’re handy with a drill and circular saw, you can modify many cabinets yourself, but if you’re uncertain about structural integrity or precise alignment, hiring a cabinetry installer is worth it. One note: make sure your cabinet’s top structure can handle the weight: most hoods weigh 75 to 150 pounds, so reinforcing support rails might be necessary.
Installation Tips and Maintenance Essentials
Before you buy, measure your cooktop width and the clearance between your countertop and cabinet bottom. Standard hood height is 18 to 24 inches above the stove surface (check your hood’s manual for the sweet spot). Locate studs in the cabinet frame using a stud finder: mounting brackets must anchor into solid wood, not just drywall or cabinet veneer. For ducted models, measure from your hood to the nearest wall or roof penetration point. Ductwork should slope slightly upward (⅛ inch per foot) to prevent grease and condensation from pooling. Use smooth metal ducts when possible: flexible dryer ductwork can sag and trap grease, reducing efficiency. Install a damper in the duct to prevent outside air from flowing back into your kitchen when the hood isn’t running. Wear safety glasses and work gloves during installation, cabinet edges and metal ductwork are sharp. For ductless models, access is easier since you’re just plugging into an outlet, but you still need solid mounting. On maintenance: clean or replace grease filters monthly if you cook daily, every two to three months for light cooks. Charcoal filters in ductless models last three to six months. Wipe the exterior with a soft cloth and mild dish soap: avoid abrasive scrubbers on stainless steel. If your hood feels noisier over time, check that mounting bolts are tight and filters aren’t clogged.
Choosing the Right Hood for Your Kitchen Layout
Start with your cooktop layout. Wall-mounted (single-wall) kitchens do best with standard under-cabinet hoods. Island cooktops need island-mounted or downdraft systems. Galley kitchens with the range opposite a wall might use an under-cabinet hood if cabinet space allows, or a slide-out model for minimal visual intrusion. Next, calculate CFM requirements: the general rule is 100 CFM per linear foot of cooktop. A 36-inch range needs roughly 300 CFM: dual islands or professional-grade ranges might need 600+ CFM. Most manufacturers list CFM ratings clearly. Consider your ductwork situation honestly, running ducts is the biggest installation variable. If ducting to outside isn’t feasible (condo limitations, extreme roof pitch, no accessible wall), go ductless and budget for charcoal filter replacements. Kitchen design styles matter, too: stainless steel compacts suit modern and industrial aesthetics: wood-paneled integrated hoods work in traditional spaces: sleek convertibles fit transitional designs. Resources like The Kitchn and tested under-cabinet range hood reviews offer real-world examples and user feedback that can help you narrow options. Finally, check your local building codes, some jurisdictions require ducted systems in new construction or renovations above a certain scope. If you’re modifying structure, installing new vents, or upgrading electrical for a hood, pull a permit. It’s easier to do it right upfront than to face issues later.
Conclusion
Under cabinet range hoods are a smart, practical upgrade that balances function with design. Whether you choose a compact stainless steel unit, a space-saving slide-out, or a seamlessly integrated model, the right hood will improve your kitchen’s air quality and look. Take time to measure, assess your ductwork options, and match the style to your space. Most DIYers can handle simple bolt-down installations: structural or ductwork modifications may warrant professional help. With proper maintenance and honest upfront planning, your new hood will serve reliably for years.